YesLaw Transcript Generator Help |
|
The following links will take you quickly to your desired topic of interest. |
|
Running Your YesLaw Transcript Generator Software for the First Time |
Adding Signatures to Your Transcript |
Adding Signatures to Your Signature Library |
|
Digital Signatures and Multi-Production Machine Environments |
Exhibit Linking – Add Exhibits |
Remove an Exhibit |
Review and Exhibit |
Edit Standard Aliases |
Adding Custom Aliases |
Manual Exhibit Linking |
Transcript Production |
Preview Transcripts |
Create Transcripts |
Email Transcripts |
Print Transcripts |
|
Create Stand-Alone MDB, LEF and AMICUS Formatted Transcripts |
|
|
Welcome |
|
Welcome to the YesLaw Transcript Generator. This application allows YesLaw Partner-Resellers to easily create fully-featured, professionally formatted, full and condensed transcripts directly from a court reporter’s ASCII or text-file transcript. |
|
YesLaw PDF Transcripts include: |
|
§ Fully configurable professional look |
|
§ Complete transcript hyperlinked word index |
|
§ Each word index page:line is hyperlinked to the occurrence within the transcript |
|
§ Clicking on the index word activates Adobe’s advanced search function |
|
§ Adobe’s advanced search enables users to search across all transcripts and exhibits |
|
§ Transcript hyperlinks to embedded exhibit documents |
|
§ Hyperlinked list of exhibit references within the transcript for each exhibit § Bookmarks for fast access to word index, exhibits, and each exhibit reference |
|
§ Copy-and-paste directly from the PDF file to WORD documents or emails |
|
§ Small file size |
|
|
Help |
|
If you are having trouble, the following paragraphs provide instructions to overcome the most common difficulties. Should you continue to have trouble, you may contact our technical support by telephone (toll-free within the US) at 800.910.5009. Or you may email technical support at support@yeslaw.net. |
Running Your YesLaw Transcript Generator Software for the First Time |
|
To create transcripts, run the YesLaw Transcript Generator application. If you are running the software for the first time, the software will provide an activation code and YesLaw’s toll-free technical support telephone number (800.910.5009). Call with the activation code to get your software activated – the process will only take a few minutes and need only be done the first time the software application is run. Alternatively you may email the activation code along with your company name to support@yeslaw.net, but response will take longer. |
Creating YesLaw Transcripts |
|
Begin by running the YesLaw Transcript Generator software
and activate the software if necessary. The software will appear as shown
below. To begin, select the court reporter’s text or ASCII file by clicking
the browse button ( |
|
The software will display a view of the transcript in the larger window on the right half of the screen. Also the software will automatically determine the case name, case/cause number, witness’s/deponent’s first name and last name, proceeding/deposition date, certain transcript types [confidential, 30(b)(6), etc] and the volume number. If the transcript includes the text Job No. followed by the job number on the caption page, this will be filled into the Job Reference field. The software is good at determining this information but not perfect so you may need to correct or wish to simplify the case name. Transcripts not of depositions will require more attention especially for the case caption. Please review the case name, deponent’s name and deposition/proceeding date by cross-checking with the transcript shown on the right. |
|
If the full case name is overly long, shorten the case name to something more practicable. |
|
|
|
Some typical transcript types such as “30(b)(6)” and “Confidential” can be selected by clicking the corresponding check boxes. A custom transcript type may be added by clicking the custom transcript type check box and either selecting an existing transcript type from the Transcript Type pull-down menu or by entering text for a new transcript type. For multi-volume transcripts, you may enter the volume number for this transcript. |
|
The project title may be auto-created from the deponent’s name, deposition date, and the confidential/non-confidential/etc. selections. You may configure the default project title naming under the Tools > Options menu in the Project Defaults section. You may over-ride this auto-determined project title at any time by clicking in the box and entering your own title. Once you have manually entered a project title, the software will no longer auto-determine the project title. Transcript jobs are saved by project title and can be recalled by clicking the Find Project… button, searching for and selecting this project title at a later time. |
|
Select the template for this job. The template includes the branding to be used for the transcript cover page and may include other specific formatting. In general the template will be selected once and need not be changed. |
|
A watermark can be placed on every transcript page by either selecting a watermark from the Watermark Text pull-down menu or by entering the text if the watermark is not already in your watermark selection list. You may select a font size for the watermark, however if the font size chosen is so large the watermark will not “fit,” the size will be reduced to fit. A font size of 200 will typically provide the largest possible watermark size. A stamp may be placed only on the cover and caption page of the transcript. To review the location, click the View\Move button. A dotted-line box with “handles” on the left and right will show the current location of the stamp. The dotted-line box will snap to the nearest transcript line as the box is dragged and released. To enlarge the stamp, adjust the width of the box by dragging the left and right handles. The stamp will be placed “behind” any existing text on the page so no text will be obscured; however, we recommend placing the stamp in a text free area. Selecting the type of stamp is handled on the third page of the wizard prior to previewing, creating, or printing the transcript document. This allows quick creation of separate certified original and certified transcript copies. |
Adding Signatures to Your Transcript |
|
A signature graphic can be placed as required within the transcript. The software will attempt to auto-determine the location for the signature graphic, although may not always get the location correct. To review the location, click the View Position button. A dotted-line box with “handles” on the left and right will show the current location of the signature. If the position is not correct, it can easily be repositioned by clicking within and dragging the dotted-line box to the proper position or simply clicking at the correct location. The box will “snap” to the nearest line – drag the box to the transcript line that includes the underline for the signature. The box width should match the underline size to size the signature properly. The width of the box can be adjusted by dragging the left and right handles to match the signature underline size. |
|
Rather than viewing and dragging the signature box, you may scroll to the proper page within the transcript, click the Set Position button, and then click on the desired location on the transcript page. To indicate you are setting the transcript position, the cursor will change to an arrow with a plus sign while over the transcript display window. For transcripts that require a second signature (e.g. Texas), you may check the Add Second Signature box to enable placement of a second signature. Unlike the first signature, the second signature is not auto-determined and must be manually positioned. The second signature maintains its own View Position and Set Position buttons and functions in a similar manner as the buttons for the first signature. |
|
|
Adding Signatures to Your Signature Library |
|
Signature graphics can be .jpg or .bmp files. Scan or photograph a signature and crop to just the signature and save as either a .jpg or .bmp file. To select the signature graphic, click the browse button […] to the right of the Graphic File location. The browse function will first browse your existing signature library. If the signature is not in your library, you may browse to where the signature is on your computer, however we do recommend the signature graphic be added to your library for selection without browsing in the future. The graphic file should be placed in the all user’s application data directory and within the YesVideo\Transcript Generator directory in a folder named Signatures. This folder is most easily accessed by selecting View > Signatures |
|
C:\Documents and Settings\All Users\Application Data\YesVideo\Transcript Generator\Signatures |
|
Instructions for creating a signature graphic file are included near the end of this document in the Creating Signature Graphic Files section. If you do not have a signature graphic for a reporter, you can create a stylized signature by clicking the Create Signature… button. A pop-up window allows you to type in the reporter’s name and select a cursive or handwriting font for the signature. A preview of the signature is shown below the font selection. Selecting the different fonts will update the preview immediately below. Once satisfied, click the Create Signature File button and a graphic file will be created and added to your signature library. |
|
Digital SignaturesThe addition of signatures described up to this point were electronic signatures. These can be either a scanned images of the court reporters actual signature or a graphic file created from a font rendering of the court reporters name. A digital signature or digitally signed document implies more. First, a digitally signed document includes traceability to and verification of the signer of the document. Second a digitally signed document includes certification that the signed portion of the document has not been altered since the document was created and signed. Obtaining a Digital Signatures CertificateTo digitally sign and certify a document, the creator must have a digital signature certificate issued by a certificate authority – a trusted organization that issues digital certificates and records the traceability of the certificates they issue. Such certificates come in a number of types with the least expensive and simplest to obtain being an email certificate which is available free from Comodo (http://www.comodo.com/home/email-security/free-email-certificate.php) or from other, perhaps better-know certificate authorities such as VeriSign for as little as $22-per-year (https://www.symantec.com/verisign/digital-id). Digital signature certificates that provide a higher degree of traceability are available but do cost more and are not required to sign and certify documents. An email digital certificate is all that is required to digitally sign and certify YesLaw PDF transcripts. Once one obtains a digital certificate, the certificate is typically installed in a Windows PC within the “Windows Certificate Store.” From there, the certificate can (and should) be exported to a file for copying from computer to computer and most importantly to create a backup of the certificate to be stored on a CD or USB thumb drive for secure, safe keeping and restoring should the computer “crash” or be stolen. You will find instructions for backing up your digital signature credentials in the “Creating a Backup Copy of Your Digital Signature Certificate” section.
Adding Digital Signatures to Your TranscriptThe Transcript Generator software allows you to add a digital signature by either browsing the Windows Certificate Store or by browsing to a Digital Certificate file. At the bottom left of the first Transcript Generator wizard page, select Use Digital Signature and then select either to browse to a Certificate File by selecting the first radio button option or select to browse to an Installed Certificate (from the Windows Certificate Store) by selecting the second radio button option. Then click the corresponding browse button […] and browse to certificate file or select the certificate from you Personnel Certificate Store. Digital Signatures and Multi-Production Machine EnvironmentsIf you have more than one production machine, the certificate files can be stored in a common, network accessible directory or the certificate files can be copied to each of the production machines. To store the certificates in a common, network accessible location, select Tools > Options on each of the production machines, select the Use this directory for signatures option, and browse to the common folder location. All signature graphic files and digital signature certificate files will be stored in this one common location. One common location simplifies maintenance of the signature files. Alternatively, each production machine can have its own copy of the signature files. On each machine, select View > Signatures folder… and copy the signature graphic and digital signature certificate files into this folder. Attorneys Experience with Digital SignaturesWhen an attorney receives and opens a transcript signed with a digital signature, the transcript signature will initially display the signature has “problems.” Opening the details of the digital certificate will show the transcript has not been modified but the signature has not been added to their trusted signatures. This is normal as the attorney must manually add each signature to their trusted identities. If a transcript is signed by a certificate from a court reporter that the attorney has not previously trusted, the signature will report “problems” until the attorney adds the court reporters digital signature to their trusted identities. If a transcript is certified with a single, common certificate used for all transcripts produced by a court reporting company, the certificate will only have to be trusted once and all subsequent transcripts will then be trusted. Adding a Certificate to Your Trusted IdentitiesTo add a transcript certificate to your trusted
identities, open the transcript within Adobe Acrobat or Reader and click on
the Signature Panel button at the top of the document window
What is Certified within the TranscriptThe Transcript Generator currently only certifies the court-reporter-supplied portion of the transcript – not the headers, footers, watermarks, logos, or word index added by the software at production time. To view what is certified within a transcript, first click to select the certificate and then select View Signed Version from the gears menu within the Signatures Panel. A separate window will open to show the testimony but will not include the added headers, footers, watermarks and word index. Any added stamp is included in the certification such that if a transcript is stamped “Rough” or “Read and Sign Only” this stamp cannot be removed with breaking the transcript certification – the certification will indicate the document has been altered.
Why is the Entire Document Not CertifiedDocuments can be digitally signed and certified in different ways: either the entire file can be certified – testimony, headers, footers, watermarks, cover page, word index, bookmarks – the whole document; or a portion of the document can be certified. For YesLaw PDF transcripts, only the testimony portion of the PDF transcript is certified – not the word index, cover page, headers or footers. This is appropriate as the court reporter is only certifying the testimony to be true and accurate – not the word index. Also attorneys prefer that the entire document not be certified as any annotations they make to a transcript file – bookmarks, highlights or sticky notes – change the file and “break” the certification. With YesLaw PDF transcripts, attorneys may make bookmarks, highlights or sticky note annotations to transcripts yet, as long as they make no changes to the testimony, the certification holds. Attorneys may also Bates Number YesLaw PDF transcripts without breaking the certification. Competitive PDF transcript formats do not include this feature. Any annotation or Bates numbering of competitive transcripts “breaks” the digital certification. Attorneys cannot make changes to the testimony without breaking the certification. Any changes to a question or answer will be indicated. As the original digitally signed version is preserved, the original signed version can be viewed by selecting the View Signed Version menu item within the Signatures submenu. Any changes made can be easily identified using the Compare Signed Version to Current Version menu item within the Signatures submenu.
Adding an Errata page to your transcriptAn errata page may be added to your selected transcript if one was not originally present. To append an errata page, check the Append Errata Page box. By default, the errata page is appended to the end of the transcript. You may change the errata page location by editing the value in the Page field next to the Append Errata Page box, but you must enter a page number greater than the first page. |
Index Start and End |
|
The Transcript Generator software automatically detects the beginning and ending of the colloquy. It is the contents of the colloquy that is indexed. You can confirm the beginning and ending point of the colloquy by clicking the View button under the Index Start and Index End settings. The start line is highlighted with a green background color and downward directed arrow on the far left. The end line is highlighted with a red background and an upward directed arrow and the far left. To change the index start line, click first on the Index Start View button then double-click the chosen start line. The line selected line will be indicated with the change in the background color and colored arrow on the left. To change the Index End line, first select the View button under the Index End settings then double click the transcript line. The Index Start and End points set the colloquy portion of the transcript and the transcript text to be indexed but also the transcript lines to be displayed with the colloquy font. The Transcript Generator allows a separate font for the condensed transcript colloquy to provide the most readable font for the four-pages-per-sheet condensed transcript. Typically the front matter and back matter (non-colloquy) will be displayed in a monospaced font to provide columnar alignment of indexes, appearances, and the birdcage. The colloquy is optionally shown/printed in a different font to maximize readability.
|
Exhibit Linking – Add Exhibits |
|
The YesLaw Transcript Generator provides an unmatched level of automation to speed the exhibit linking process yet you ultimately have full control to provide the highest level of quality. |
|
Once your transcript has been imported on the first page of the application, proceed to the next page by clicking the Next > button in the lower right corner. Then click the Add Exhibit Files… button and browse to the exhibit files associated with this transcript. Select one or more or all of the exhibit files and click Open. To select more than one file at once, hold down the Ctrl key while clicking on the individual files. To select a range of files, click to select the first file and then hold down the Shift key and click the last file in the range – the entire range of files will be highlighted – and click the Open button. Alternatively you may use your mouse to drag around all the exhibit file icons to select them. |
|
Once you have added the exhibit files, give the application a moment to do its work. The application will attempt to automatically determine the exhibit file number and then, based on standard ways of referencing exhibit files in transcripts, all the references to the each exhibit will be identified. All the “hits” or locations where exhibit references were found will show in the Search Hits list on the right. |
|
After the software has found all the exhibit references, first glance at the exhibit number the software has determined for each exhibit file added. The exhibit file name will be shown in the list on the left followed by the auto-determined exhibit number in blue-underlined characters. This blue-underlined exhibit number can be clicked to change the corresponding exhibit number for the file. The exhibit number should be changed if the software improperly determined the exhibit number. To speed the process, name your scanned exhibit files with the exhibit number at the end of the file name. |
|
Once you have confirmed all the exhibit numbers are correct, then scan the Search Hits list to the right and uncheck the checkbox for any hits that are improper. This should occur only rarely. |
|
These few steps are generally all that is required to do your exhibit linking, proceed to the next application page to create your files by selecting Next >. |
|
|
Remove an Exhibit |
|
The remove an exhibit file, once added, click to select the exhibit file in the Exhibit Files list on the left and then click the Remove Selection button. To remove all exhibit files, select the root Exhibit Files folder at the top and then click the Remove Selection button. |
Review an Exhibit |
|
The review (open it up to look at it) an added exhibit file, simply double-click on the exhibit file in the list. The exhibit file will open in the default application for the exhibit file type. |
Edit Standard Aliases |
|
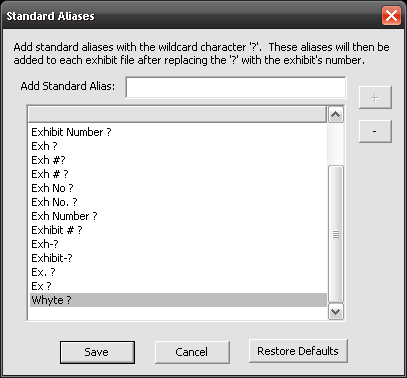
The software uses a list or standard ways to reference exhibits within transcript called Standard Aliases. Standard aliases include: Exhibit ?, Exhibit Number ?, and Ex ? where the question mark is a “stand-in” for the exhibit number. The software will find all references within the transcript that match a standard alias format. The supplied standard alias list will match most exhibit reference formats; however there may be other formats you or your reporters use. You may add or remove aliases from the standard alias list by clicking the Edit Standard Aliases… button. A window will appear as shown below. To add a standard alias, type in the format for the exhibit reference using a question mark as a stand-in or replacement for the exhibit number then click the plus sign on the right to add. To remove a standard alias, select the alias from the list by clicking and click the minus sign to the right. Once you have added or removed all the aliases, click the Save button. The changes will be reflected for all future transcripts processed. To return to the “factory presets,” click the Restore Defaults button. |
|
|
|
In the transcript example above, the exhibits were often referenced by the deponent’s name (Whyte) followed by exhibit number. To catch all these exhibit references for all the exhibit numbers, an alias: Whyte ? was added to the list. This found all the references for all the exhibits using the Whyte ? format. But this would only work for deponents with Whyte as their last name. Better, add a standard alias using the {{Last}} substitution field. The standard alias would be {{Last}} Exhibit ?. This will automatically link any exhibit reference that uses the witness’s last name followed by Exhibit and the exhibit number.
|
Adding Custom Aliases |
|
If a particular exhibit is often referenced in a unique way within the transcript, for example “the December Contract,” a custom alias can be added for that exhibit to link to such references. To add a custom alias, add the exhibit file and then click to select the exhibit in the exhibits list on the left. Once a single exhibit is selected, click the Edit Custom Aliases button below the transcript. The Add Custom Aliases window will appear as shown below. Type in the text to be linked to the exhibit in the Add Custom Alias: box and then click the plus button [ + ]. To remove a custom alias, click to select the custom alias in the list and click the minus button [ – ]. |
|
The window also allows the Exhibit Number to be changed by updating the existing exhibit number. |
|
|
Manual Exhibit LinkingTo manual exhibit portions of transcript text, first select the exhibit to be linked from the exhibit files list on the left. Then drag over the text in the lower transcript display window and click the Manual Link button immediately below the lower transcript display window and to the right of the text search entry box. Clicking the Manual Link button will link only the selected text occurrence. Clicking the Manual Link All button will link every matching occurrence of the selected text throughout the transcript. The selected text becomes a “custom alias” for the selected exhibit. Some users may find this approach to adding custom aliases for exhibits to be more intuitive and less prone to typographical entry errors.
|
Transcript Production |
|
After importing the transcript, verifying the case and deponent name and deposition date, and adding the exhibits, the transcripts can be produced. The last wizard page of the application provides a number of different options for producing the transcripts. |
Preview Transcripts |
|
To create transcripts to preview them, check the Preview check box and select either the full, condensed, or both transcripts to be previewed. The select transcript options for the full and condensed transcripts: check Cover Page to include a (branded) cover page, check Word Index to include a complete word index at the end of the transcript, and finally check Exhibits to include embedded exhibits within the PDF transcript package. MDB, LEF, and AMICUS-formatted transcripts as well as the original court reporter’s page ASCII may be attached or embedded within the PDF transcripts as well – simply click the corresponding checkboxes beneath either the full and/or condensed transcripts. Once the options are selected, click the Produce Files button and wait a moment for the software to do the work. It should take no more than a few seconds to produce the files and for your PDF viewing software of choice to open the files for review. If your PDF viewing software is already running, the files will open faster. Once the files open for preview, you may save them to the location of your choosing, upload them to a repository, burn them to a disc, and/or email them. |
Viewing PDF Files |
|
To preview PDF transcripts, your computer will require some software that can open and view a PDF file. We recommend you choose Adobe Reader or Acrobat software to view the PDF files as Adobe software is the software attorneys are most likely to use. Free viewing software can be downloaded from Adobe’s website: http://get.adobe.com/reader/ . Please note that to realize all the advanced hyperlinking and document embedding (attachments) features of the transcripts, you will need a more recent version of Adobe Reader or Adobe Acrobat. Also, not all third-party PDF viewing supports all the newer features within the transcript e.g. embedded exhibits; however, the transcript should be viewable regardless of the viewer software version. |
Transcript Configuration Options |
|
There are check boxes for the different transcript configuration options under both the full-sized transcript and condensed transcript. You have the option to include a cover page or not. You have the option to include the hyperlinked word index or not. You have the option to include a number of additional transcript formats as attachments within the single PDF file including an MDB (native Sanction) file, LEF (native LiveNote) file, AMICUS and the original text/ASCII file used to create the PDF transcript. |
|
Within the full-sized transcript, you also have the option to attach the condensed transcript as configured with the checkboxes shown for the condensed transcript. This produces a single PDF package that includes both the full-size as well as condensed in a single file. You may also attach additional transcript files and other additional files by selecting the additional files using the Additional Files… button and then checking the checkbox for attaching additional files. You may attach transcript formats not produced within the Transcript Generator such as e-Transcripts. |
|
The PDF transcripts can be configured to open with either the Bookmarks Tab or Attachments Tab open by default when the attorney opens the transcript file. This configuration is under Tools > Options > Show/Hide Tab within the Transcript Initial View Options section. As the Adobe viewer only allows either the Bookmarks Tab or Attachments Tab to be open at once, you may select only one to be open by default when the file opens. Having the Attachments Tab open by default may help the attorneys understand they have copies of the exhibit files within the PDF transcript. The default is to have neither the Bookmarks Tab nor Attachments Tab open by default. |
|
|
Create Transcripts |
|
To create the transcripts without opening for preview, check the Create Files checkbox and select your transcript options (cover page, word index, exhibits) as described above. Then below all the check boxes, click the browse button for the Create File Location: and browse to the file or directory where the files should be placed. Click the Produce Files… button and the software will write the transcript(s) to the chosen file/directory. Once complete, the software will indicate the files were successfully written and provide you with the option of opening the destination file/directory. |
Email Transcripts |
|
To include either full, condensed and/or both transcripts in an email, check the appropriate check boxes within the email column and then click the Produce Files button. The transcripts will be created in the temporary directory (e.g. C:\Documents and Settings\All Users\Application Data\YesVideo\Transcript Generator\Temp), Microsoft Outlook will be opened, and the transcripts will be attached to the email. |
|
The email will be automatically created based on the email template selected. You may create as many customized email templates as required. The software will automatically fill in the email subject line and job specific information within the email such as case, deponent name, and deposition date. See Creating Email Templates for further information. |
Print Transcripts |
|
To print either full, condensed and/or both transcripts, check the appropriate check boxes within the Printer 1 column and then click the Produce Files button. The transcripts will be created in the temporary directory (e.g. C:\Documents and Settings\All Users\Application Data\YesVideo\Transcript Generator\Temp) and then dispatched to the printer. To setup the printer and select paper tray if required, click the Printer Setup… button near the bottom. You do have the option of configuring both Printer 1 and Printer 2 as the same printer but different paper source trays – to print the cover on a different paper stock or pre-printed stationery. Or both Printer 1 and Printer 2 may be the same printer but one setup for single-sided printing and one setup for duplex printing. |
Print Options |
|
When printing, make sure the Auto-Rotate and Center check box is not selected and the Page Scaling option is set to None. These options will resize the document overriding your selected margin and spacing values. |
Cover Page Only |
|
The Transcript Generator allows users to add a branded cover page to the beginning of a transcript. This branded cover page can include color art which is especially nice for electronic delivery of transcripts. For paper delivery, users may wish to print the cover page to a color printer and the remainder of the transcript to a black-and-white printer to save expensive color toner. The software allows the branded Cover Page to be printed separately to send the page to a color printer or to print on special cover-page paper stock. |
Exhibits Folder |
|
The Exhibits Folder option allows a folder named Exhibits and containing all of the exhibit files to be saved in the Create Files location. If the Exhibits Folder email option is selected, the exhibit files are attached to the email as individual files. |
Create Stand-Alone MDB, LEF and AMICUS Formatted Transcripts |
|
To imbed MDB, LEF and AMICUS formatted transcripts within your full or condensed transcript, select the MDB, LEF, and/or AMICUS check boxes under the corresponding transcript. If you would like to create these files as stand-alone files (not imbedded within the full or condensed transcript) select the separate MDB, LEF, AMICUS checkbox near the bottom of the options. You have the choice of either creating the files – saving them to the Create Files location or emailing the files. |
Upload Files |
|
Exhibit files are often so large, they cannot be emailed – email servers remove large attachments. To electronically communicate such files, the Transcript Generator includes the option of uploading transcripts and exhibit files to our secure server and emailing a link to the attorney for them to click to access and download the transcripts and exhibits. As the documents are not emailed, their communication is not limited by file size. Under the Upload column, configure the full and condensed transcripts (select the appropriate checkboxes), check the Exhibits folder box to send the exhibits, and check the MDB, LEF, AMICUS box to send the other transcript formats. Then click the Upload Files… button to upload the files to our server. You can check the progress of the uploading files by clicking the Check Upload Status button. On the status window, click Clean Up to remove the already uploaded files from the list. Currently uploading files and/or files that failed to upload will remain in the list. At the bottom, a hyperlink indicating “Click here to access transcripts and exhibits” provides quick access to the same page the attorney will use to access the transcripts and exhibits. To include the link in an email to the attorney, click the Copy to Clipboard button to copy the hyperlink to the clipboard. Then paste the link into your email. The link provides access to this single transcript (full and condensed) and associated exhibit files. If you are using Outlook, the Transcript Generator will create a customized email including the link by selecting an Upload Email template from the pull-down list and clicking Upload Email… The Transcript Generator will create a new email within Outlook that contains the hyperlink for the attorneys to use. The Upload Emails are created based on templates created within Microsoft WORD and saved as a .DOC (not .DOCX) file format into the Upload Emails folder. Access the Upload Emails folder by selecting the View > Upload Emails… menu item. An Acme sample is provided with the software in this folder. The sample includes substitution fields for the deponents name, deposition date and case caption. You’ll recognize the substitution fields as text descriptor words enclosed in double braces (e.g. {{DepoDate}} for the deposition date). A list of the available substitution fields is provided below. The Upload Files function provides attorneys with access to a single deposition – transcripts and exhibits. The Publish To function can be used to publish the deposition to the attorneys account. Attorneys can log into their account and access all of the transcripts and exhibits published to account organized by case. |
Publish To |
|
The Upload function allows transcripts and even large exhibits to be communicated to attorneys electronically. But attorneys increasingly expect convenient, 24/7 access to a repository containing all their transcripts and exhibits. The Publish To function provides just such access. Transcripts and exhibits published to ordering attorneys are uploaded to the server and published to the attorneys’ private accounts for their access. Attorneys can login using their email and password to access all transcripts and exhibits (and even other files) published. Transcripts and exhibits published to the attorneys’ accounts are organized by case caption, so it is important that case captions are consistent for all the depositions within that case caption. To ensure consistency, a pull-down menu is provided for the case caption on the first wizard page. Selecting the case caption for previous depositions ensures consistency. To publish depositions to ordering attorneys, click the Publish To… button and add the attorneys email address (and first and last name). After typing a few letters of the email address, the software will suggest all previously entered email addresses that match. Selection from the suggestion list will save some typing and speed the process. |
Additional Files |
|
Additional files – files created outside of the Transcript Generator – can also be uploaded to the repository and published to ordering attorneys using the Additional Files… button. If the files are transcripts, they should be added as transcripts such that they will be organized with the other transcript formats. If the files are not transcripts, the files should be added as “other” files. Once the ordering attorneys email addresses have been entered and the additional files added, all should be uploaded to the online repository server by clicking the Upload Files… button. The YesLaw Transcript Generator produced transcripts, exhibits, other transcripts and other files will be uploaded to the server and published to the entered ordering attorneys private account. |
Publish To Attorney Accounts |
|
The Publish To accounts are named with the attorneys email address – unique to the attorney. Once logged into their account, attorneys can add their assistant or paralegal to their account for access. The paralegal or assistant will have access to all content published to the attorney. However, if the attorney has a common email domain (hotmail, gmail, yahoo, etc.) they will not be allowed to add users to their account. This is to prevent unintended sharing of confidential case information outside of the firm and to dissuade attorneys from sharing transcripts with attorneys who have not purchased the transcripts/exhibits. Attorneys can always download transcripts and exhibits and then email them to other attorneys, but we are not going to facilitate such behavior. |
Disc Images |
|
The software allows the creation of a disc image which is a folder that contains all the files to be burned for a disc deliverable for the attorney. The disc deliverable can be customized using the check box configuration options. The disc deliverable includes an auto-run menu application that runs when the attorneys inserts the disc into their computer (unless they have configured their computer otherwise). The menu application presents the different items on the disc and provides a simple interface for the attorneys to open or save the files on the disc to their computer. |
|
Repository users can customize the auto-run application with their branding information and links to their web pages. The brand is selected using the pull-down menu immediately below the Create Disc Image Location. |
|
The folder containing the disc image files is written to the path entered into the Create Disc Image Location box. This path can be automatically filled in using the Tools > Options > Advanced tab under the Default Create Files Locations. Users can enter replacement fields into this create files location to have the software automatically fill in the path for the disc image folder. The name of the disc image folder is entered into the Tools > Options > Defaults tab as the Disc Image Name. The default disc image name is… |
|
{{Last}}.{{First}}.{{depoday}}{{depomonth}}{{depoyear}}_DiscImg |
|
so that the disc image is named for the witness’s name and deposition date.followed by “DiscImg.” |
Robotic Burner Dispatch |
|
Disc images can be dispatched to robotic burners that burn the files to the disc and then label the surface of the disc. Single-click disc dispatch can be a real time savings over the more common multiple steps and multiple programs to copy files to a disc and then labeling the disc surface. The number of disc copies to create and a priority can be assigned to discs dispatched to the robotic burners. Currently only the Primera (running PT Burn Server software) and Epson Discproducer (running Total Disc Bridge software) robotic burners are supported. |
|
The software allows customization of the label through the Template Manager Disc tab – select Tools > Template Management > Disc tab. Begin by selecting a disc label background and then apply the text fields to the desired locations on the disc surface. The software allows selection of the font, font size and color for the added text. |
Disc Label Production |
|
For users without an expensive robotic burner, the
Transcript Generator produces two PDF files that can be printed to sticky
label stock (e.g. Avery 5692) for labeling discs. The PDF file is for sticky
label stock where the two disc images are vertically aligned. The second PDF
file is for sticky labels where the two disc images are offset. |
|
Also the software produces a graphic file to be imported
into other labeling applications for example LightScribe and Epson
non-robotic printers. |
Project Tasks |
|
(this function is currently disabled until most of the individual project task programming is completed) |
|
The interface provides a comprehensive set of options, but like only a few “sets” of options will commonly be used. That is the number of general tasks will be few. The software allows users to configure a set of production options then save the options as a named task for later use simply by selecting the task from the pull-down menu at the top of the page. Selecting a task, will recall the transcript production options (all the check boxes) from memory speeding the production process and eliminating the chance or incorrectly choosing options during production. |
|
To configure a production task, simply check all the necessary check boxes and click the Save As… button adjacent to the task selection pull-down menu. Then save the task by name. The task will then be available from the pull-down menu. |
Project Name Customization |
|
You may customize the auto-created Project Name by selecting the Options menu item under the Tools menu. Within the Project Defaults, modify the Project Name entry. An example is shown below. The Project Name is constructed with fixed text and a number of replacement fields that the software fills-in automatically. Each replacement field is indicated by a field name surrounded in double braces. |
|
{{Ref}} {{Last}}, {{First}} {{DepoDate}} {{Vol}} [{{Conf}}] |
|
The software supports a number of replacement fields to allow a significant amount of flexibility in naming your projects. A complete list of replacement fields is provided below, however be aware that {{stamp}}, {{format}}, {{NZ}}, {{bold}}, {{watermark}} and {{exhibits}} may only be used to customize your transcript naming. {{logo}} is only used to include a logo in the header or footer of a transcript. |
|
{{First}} first name |
|
{{FIRST}} FIRST NAME in all CAPS |
|
{{Last}} last name |
|
{{LAST}} LAST NAME in all CAPS |
|
{{case}} case name |
|
{{case number}} case/cause number |
|
{{DepoDate}} deposition date |
|
{{ref}} job reference number |
|
{{vol}} volume number |
|
{{filename}} Original court reporter’s text/ASCII filename. |
|
|
|
{{Today}} 03/22/2010 (mm-dd-yyyy) |
|
{{Today1}} March 22, 2010 (month dd, yyyy) |
|
{{Today2}} 2010-03-22 (yyyy-mm-dd) |
|
{{Today3}} 3-Mar-10 (d-mon-yy) |
|
{{DepoDate}} 03/22/2010 (mm-dd-yyyy) |
|
{{DepoDate1}} March 22, 2010 (month dd, yyyy) |
|
{{DepoDate2}} 2010-03-22 (yyyy-mm-dd) |
|
{{DepoDate3}} 3-Mar-10 (d-mon-yy) |
|
{{depoday}} two-digit day (e.g. for January 13, 2011 = 13) |
|
{{depomonth}} two digit month (e.g. for January 13, 2011 = 01) |
|
{{depoyear}} two digit year (e.g. for January 13, 2011 = 11) |
|
{{timestamp}} “TS” when court reporter time stamps are selected for the full transcript, otherwise blank. |
|
{{bold}} “BQ” if Bold Questions are selected, blank otherwise |
|
{{watermark}} Watermark text. |
|
{{template}} Template selected. |
|
{{stamp}} Stamp filename if a stamp is selected. Otherwise blank. |
|
{{format}} “full” or “cond” to denote full or condensed transcript formats* |
|
{{NZ}} “N” or “Z” to denote condensed transcript vertical layout* |
|
{{exhibits}} “ex” if exhibits are added, blank otherwise* |
|
{{logo}} see description of header or footer graphic below |
|
|
|
* will only work for transcript file naming as they are transcript configuration specific |
|
Header or Footer GraphicsA logo graphic can be added to the transcript header or footer by adding the {{logo}} substitution field on the desired location within the transcript template file. The graphic file must be placed in the Cover Art folder and the name of the graphic file must be identified within the template. In the example below, the graphic file is names “YesLaw.bmp.” Bitmap (.bmp) or JPEG (.jpg) graphic files are allowed. <Setting Name="HeaderFooterImage" Value="YesLaw.bmp"/>
{{logo} A logo graphic can be added to the header or footer. |
|
The graphic will be scaled to fit within the available footer space and will span from the bottom of the footer to the bottom of the transcript outline or border box. If you would like some white space between the logo and the border box, leave some white space at the top of the logo graphic file.
|
Transcript Name Customization |
|
You may customize the auto-created Transcript Names by selecting the Options menu item under the Tools menu. Within the Project Defaults, modify the Transcript Name entry. An example is shown below. The Transcript Name is constructed with fixed text and a number of replacement fields that the software fills-in automatically. Each replacement field is indicated by a field name surrounded in double braces. |
|
{{filename}}_{{format}}_{{NZ}}_{{exhibits}}_{{Bold}}_{{stamp}} |
|
The software supports a number of replacement fields to allow a significant amount of flexibility in naming your transcripts. A complete list of replacement fields is provided immediately above in the Project Naming Customization section. Note that {{stamp}}, {{format}}, {{NZ}}, and {{exhibits}} may only be used to customize your transcript naming. |
Creating Email Templates |
|
Create your own email templates in Word including graphics and formatted text and saving the template as a WORD .doc file. The template document then must be saved within the Email Templates folder opened by selecting the Templates Folder… menu item under the View menu. |
|
The email templates may be multiple pages long and can include multiple instances of the replacement fields provided above in the Project Naming Customization section. Note that {{stamp}}, {{format}}, {{NZ}}, and {{exhibits}} may only be used to customize your transcript naming. |
Email Subject Line Customization |
|
These same replacement fields can be used to customize the email subject line within each template – so each template can have a different subject line. If subject line customization is not provided within the email template, the subject line defaults to the subject set up under the Options Page found under the Tools menu. There you will find email defaults including the subject line and the blind copy (BCC) email addresses. |
|
The subject line for an email template is entered into the subject field of the template document properties. The document properties within WORD’s new “ribbon” interface is found by selecting the Office Button (the round one in the upper left corner of the ribbon) then selecting Prepare and Properties. Enter the subject line using text and replacement fields into the subject field. In older versions of WORD, you can find the subject field by selecting File > Properties. |
Creating Cover Letter Templates |
|
Create your own cover letter templates in Word including graphics and formatted text and saving the template as a WORD .doc file. The template document then must be saved within the Cover Letter Templates folder opened by selecting the Cover Letters Folder… menu item under the View menu. You cover letter templates may be multiple pages long, may included separate letters including a read-and-sign instruction letter, and may include multiple instances of the replacement fields provided above in the Project Naming Customization section. Note that {{stamp}}, {{format}}, {{NZ}}, and {{exhibits}} may only be used to customize your transcript naming. Creating Signature Graphic FilesThe following provides instructions on how to create a signature graphic file to be used within the YesLaw PDF Transcript Generator application. The PDF Transcript Generator application will add this signature to created PDF transcripts on the court reporter certification page. This procedure does not assume the use of any special software but utilizes software available on a typical Windows PC. Sign a Page and Scan Your SignatureTo begin, sign anywhere on a blank piece of white paper but not too near the edge. Use a Flair type marker so the line weight is not overly fine. A fine ball point pen will not scan and look as good when inserted into PDF documents. Select a dark pen color. Then scan the signed page to a PDF-formatted file - this is a typical option for scanned files. For court reporters, you may use the same scanner used for scanning exhibit documents. For a black signature, scan in black-and-white. For a color signature, scan using color. Open the Scanned Page in Adobe Acrobat or ReaderOpen the scanned page PDF file with Adobe Acrobat or Adobe Reader. Should you not have either of these applications, Adobe Reader is a free download (http://get.adobe.com/reader/). Download and install the Adobe Reader software and open the scanned page PDF file. An example of a scanned signature opened within Adobe Reader X is shown below.
The process now will differ only slightly depending upon the Adobe Acrobat or Adobe Reader software (and version) chosen to open the PDF file. Within Adobe Reader X, chose Edit è Take a Snapshot. The cursor will change to cross hairs (+). Drag over the signature making sure to capture the entire signature without excessive white space around the signature. The captured area will be shown in light blue as you drag over the signature.
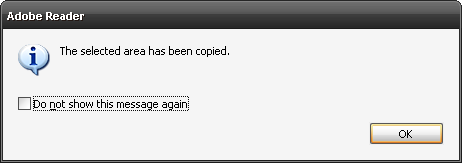
When you release the mouse button upon completing your selection, the software may confirm the selected area has been copied with the alert box shown below. If you had previously requested this alert box not be shown, there will be no confirmation.
Within Adobe Acrobat, select the I-beam selection tool and drag over the signature then select Edit è Copy or use the Ctrl + C keyboard short cut. Trim and Save the Signature in PaintNow open the Paint application. This application is included on all Windows PCs although sometimes the application is not quite so easy to find. For my computer, I find Paint by selecting the Start menu in the lower left screen corner, then selecting All Programs and then selecting the Accessories folder. An untitled Paint window will open. Paste the previously copied signature into Paint by selecting Edit è Paste or using the Ctrl + V keyboard shortcut. Do not be too concerned that the signature appears larger than you expected. Also do not be too concerned if there seems to be too much white space around the signature. However, if you accidentally cropped some of the signature, return to Adobe Acrobat or Adobe Reader and re-copy the signature.
In the example, I did not capture excessive white space around the signature, but the space can easily be reduced. Immediately after pasting the signature, click on the signature and drag to the upper left until the white space to the left and above the signature is minimized. See below.
Then to reduce the white space below and to the right of the signature, mouse-click in the dark grey area outside of the white copied signature area but within the Paint window and then drag the tiny white box in the lower right corner of the signature upwards and to the left until the white space is minimized. Now save the trimmed signature by selecting File è Save As… and enter the signature name as the file name. Select the Save as Type as a .bmp file type by selecting 24-bit Bitmap (*.bmp, *dib) from the pull-down menu. Save the file temporarily to your desktop. Install the Signature into the YesLaw PDF Transcript GeneratorNext open the YesLaw PDF Transcript Generator and select View è Signatures folder…. The Signatures folder will open. Drag-n-drop or cut-n-paste the saved signature file into the Signatures folder. The signature will immediately be available for adding to transcripts by clicking the […] button within the Signature Graphic area.
|
Creating A Backup Copy of Your Digital Signature Certificate |
|
Upon obtaining a digital certificate, one should always make a backup copy for transferring the signature to other computers for use as well as disaster recovery. The following few paragraphs describe how to make a backup copy of your digital signature. To transfer or restore a digital signature, transfer the file to another computer and double-click the digital signature file to install. |
|
Within Internet Explorer, select Tools > Internet Options, or click the Start button in the lower left corner, then select Control Panels from the Start Menu and select the Internet Options control panel. Then select the Content tab and click the Certificates button. A list of all the installed certificates will be shown. It looks like the sample shown below. In this example, there are certificates provided by COMODO, GlobalSign, and VeriSign. Click to select a certificate then click the Export… button to export the certificate from the Windows Certificate Store to a stand-alone certificate file. The Certificate Export Wizard will appear and guide you through the export process. |
|
|
|
Select the “Yes, export the private key” option. The No option only exports your “public key” and is used to send your credentials to others who might receive your digitally signed documents. You will need your password to export a certificate file with your private key. |
|
|
|
On the Export File Format wizard page, click to select the “Personal Information Exchange – PKCS #12 (.PFX)” option and click to check the “Include all certificates in the certification path if possible” and the “Enable strong protection (requires IE 5.0, NT 4.0 AP4 or above)” options – see below. Then click the Next > button. |
|
|
|
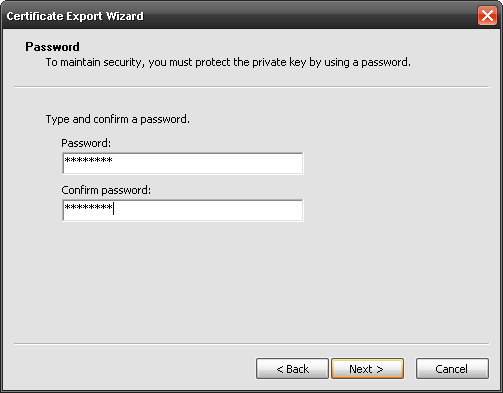
Enter your password (twice). You will need to enter your password to export your digital signature credentials with your private key. |
|
|
|
Then click Browse… and browse to a location to save your digital credentials as a file. |
|
|
|
For example, I have selected to export to my desktop with the filename “John’s Digital Certificate Backup.PFX.” Click Save and then click the Next button on the wizard. |
|
|
|
The wizard will confirm the export with a window as shown below. Click Finish. |
|
|
|
You’ll then want to copy the file saved to appropriately labeled CD or USB flash drive for safe keeping. Just saving it to your hard disk will not help if your hard disk fails. The CD or USB flash drive may be inserted into another computer to copy the digital credentials to another computer. Simply double click on the exported file in another computer to install the digital credentials. You will need your password to install. |
Editing Templates |
|
To change your template settings or create new templates, select the Tools > Template Management menu item to recall the Template Management tool. |


 Once
you have obtained your digital signature certificate, export the certificate
to a file and copy the file to either a CD or USB thumb drive and save in a
secure location in case you need to recover or restore your certificate.
Once
you have obtained your digital signature certificate, export the certificate
to a file and copy the file to either a CD or USB thumb drive and save in a
secure location in case you need to recover or restore your certificate.